
If you purchase a new laptop, most likely you’re using Windows 10 Home operating system. If you upgraded your workstation (desktop or laptop) from Windows 7/8.x to Windows 10 Home. And if you have not upgraded your desktop or laptop, you have until July 29, 2016 to upgrade for free. After July 29, 2016 you have to pay to upgrade your operating system to Windows 10 Home ($99) and Windows 10 Professional ($199).
BitLocker is only available to Windows 10 Professional or Enterprise Edition. If you’re using Windows 10 Home operating system, you need to upgrade to Professional edition this will cost $99 per license.
Assuming your operating system is Windows 10 Professional. Let’s start upgrading your workstation. Click on the Windows icon, Settings. In Settings, search for BitLocker. You will see “Manage BitLocker“, double click to start the program.
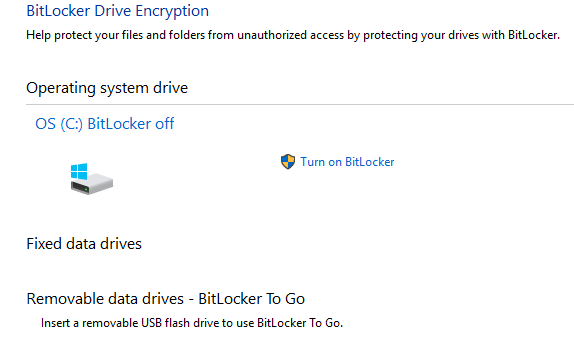
Click on “Turn on BitLocker” and you see error as show below.

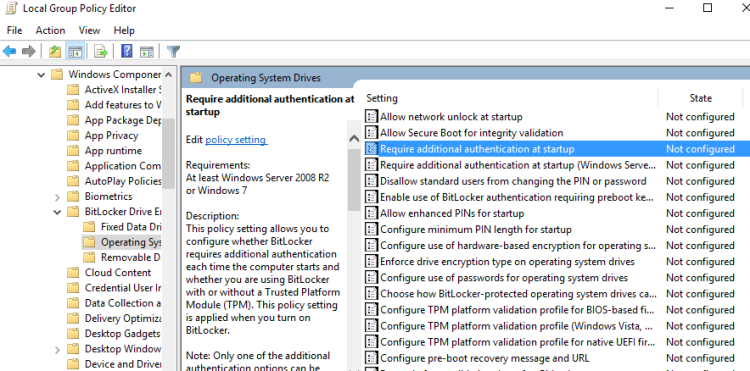
Ok. Let’s fix this error “This device can’t use a Trusted Platform Module. Your administrator must set the ‘Allow BitLocker without a compatible TPM’ option in the ‘Require additional authentication at startup’ policy for OS volumes.”
By the way, TPM is a chip added to the computer that has extra security features to manage/compute the encryption key.
Let’s run group policy. In Run (or in I’m Cortana. Ask me anything) enter “gpedit.msc” and press Enter.

Expand Computer Configuration – Administrative Templates – Windows Components – BitLocker Drive Encryption – Operating System Drives.
On the right column, select ‘Require additional authentication at startup‘. Double click and choose Enabled and Allow BitLocker without a compatible TPM box.
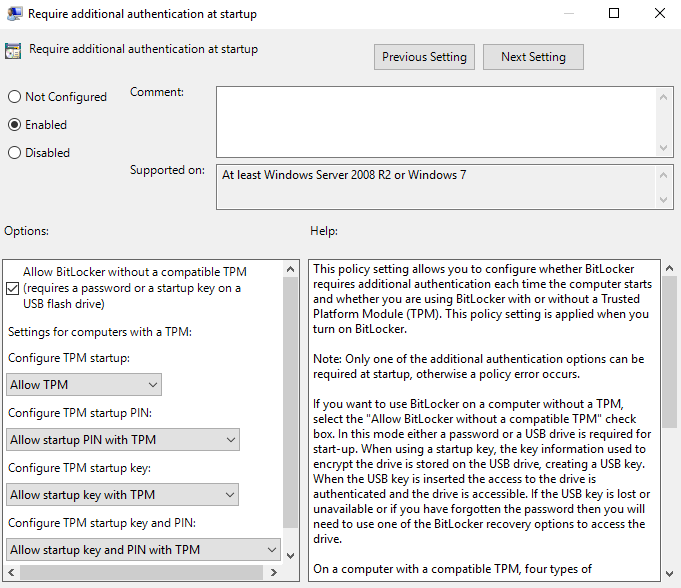
Click OK, close the group policy and continue.
Run Manage BitLocker again, click on Turn on BitLocker. If everything is ok, you should see two options how to unlock your drive.
 Because our workstation doesn’t have a TPM chip to save the encryption key, we have given two option to save it a USB flash drive or to Enter a password.
For this example, I’ll use “Enter a password”. Enter a password, confirm, then save.
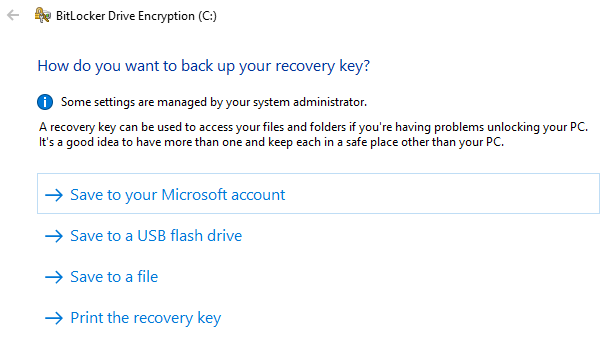
For simplicity, I choose “Save to a file“. Note. Save this file to a secure place.
Choose how you want to encrypt the drive.
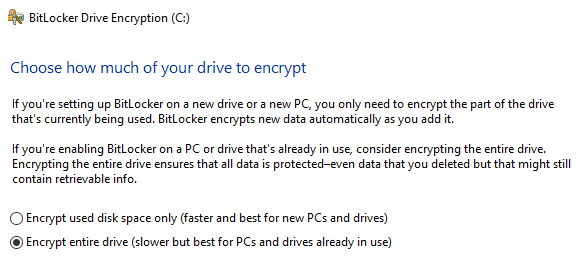
Let’s encrypt the entire drive. Click Next to continue.
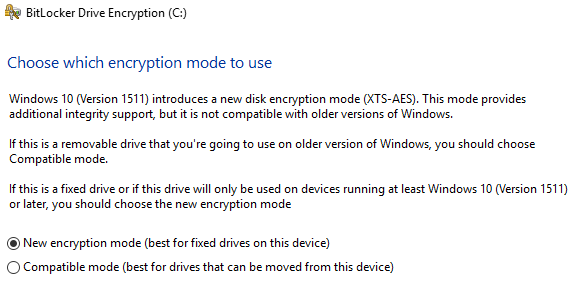
Click Next to continue.
One last check …

Click on Continue. You will receive a notice that “encryption will begin after the restart”.
Go ahead and restart.
My PC doesn’t have a TPM chip, every time I started the BitLocker will prompt to enter the encryption key (password) that I created earlier.
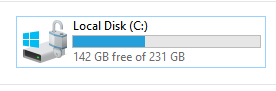 After that, check your local C: drive you will see an pad-lock icon to represent your local drive is now encrypted.
If you have any questions, please use the comment form below.
Thank you for reading.
Source: Que.com


0 Comments